
You stood in front of something breathtaking, snapped a dozen photos, and came home with crooked horizons, a flagpole sprouting out of your partner’s head, and 50 strangers wandering through every frame. Sound familiar? Learning to take better travel photos doesn’t require a fancy camera or a photography degree. It mostly takes a few smart habits, a little patience, and knowing where to stand.
I’m usually the one behind the camera on our trips, which means I’m also usually the one missing from the pictures. On our anniversary trip to Switzerland, Chris and I slipped out of dinner between courses on Mt. Pilatus to climb up and catch the sunset; we both made it into the shot. In this post, I’m sharing 30 tips I’ve learned along the way, from dodging crowds and nailing composition to posing so you actually look good in your vacation photos.
30 Tips to Take Better Travel Photos
This page may contain affiliate links. If you choose to click on one of the links and then make a purchase, Just Wander More may earn a small commission. The commission is paid by the company at no extra expense to you. Read the full disclosure here.
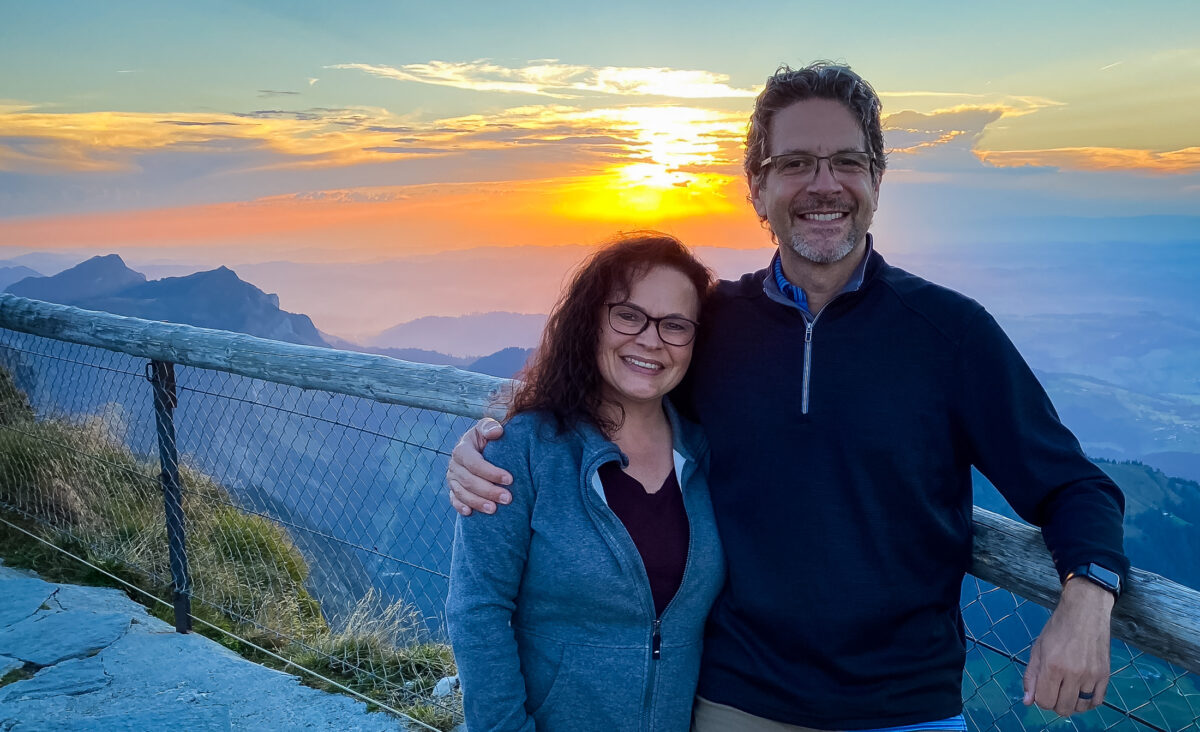
Most of the travel photo mistakes I see come down to timing and crowds, so that’s where this list starts. Whether you’re shooting with a DSLR or your phone, these tips will help you take better travel photos at even the busiest landmarks.
Shooting mostly on your phone? My iPhone travel photography tips cover settings and editing tricks, and my travel tips from frequent flyers cover all the other details that makes a trip run smoother.
1. Avoid Visiting Popular Sites at Popular Times

It’s not the most exciting advice, but it’s the one that works best. Crowds build fast at famous landmarks, so getting there early in the morning or later in the evening gives you a better shot at a clear frame. Bonus: that’s when the light is softest and prettiest too.
Not a morning person? Sometimes sacrifices have to be made for the perfect picture. Other busy times to avoid when you can:
- Holidays and local festivals
- High season
- Weekends
- Around noon
Can’t avoid the crowds? Tilt your camera up and frame the shot above everyone’s heads, or crop the crowd out later. And sometimes you just have to go with the flow and accept that your shot will include 50 of your new best friends.
2. Wander Away From the Crowds & Tour Groups
One of my golden rules for dining while traveling is to wander about five blocks away from the main tourist area. That’s where you’ll find the restaurants locals actually eat at, and the same rule works for photos.
When the main square is packed with tour groups following a guide’s raised umbrella, step away and explore the side streets. That’s where you’ll find the shots most people miss: local markets, colorful doorways, quiet cafés, and beautiful architecture without the crowds.
You’ll be amazed how much better your travel photos get when you slow down and actually look around.
3. Be Patient

Ever scroll past a photo of a famous landmark with no extra tourists in it and wonder how the photographer pulled it off? Usually it’s patience, plus a camera that’s ready to go the second the last tourist walks out of frame.
At the Trevi Fountain in Rome, I waited (and waited) for the exact moment my shot was clear to capture a shot of my daughter. It took a while, but that one empty second was worth it. Patience won’t always reward you with a tourist-free shot. Sometimes you just have to be okay with that.
4. Have Your Camera Settings Dialed In & Act Fast

Being patient only pays off if you’re ready when the moment comes. While you wait, get all your camera settings dialed in. Take a few test shots while the crowd mills around, then adjust for light, change your angle, or zoom in so you know exactly how the shot will look.
Once the frame clears, act fast.
The sign in front of the General Sherman Tree in Sequoia National Park is almost always surrounded by tourists lining up for a photo. To capture it without anyone in the frame, I had my settings ready and waited for a break in the crowd. I had maybe 2 seconds.
Related Post: 15 Super Things to Do for One Day in Sequoia National Park, California
5. Stand So the Crowd Disappears Behind Your Subject
Sometimes it’s simply impossible to wait for everyone to clear out of your shot. Instead, use your subject to hide them. Position yourself, your partner, or your travel buddy so they block the people in the background. Step left or right, crouch down a little, or zoom in until the crowd tucks neatly out of view.
Voilà! The scene looks empty, and you look as though you have mad photography skills.
6. Simply Ask People to Move
Most people will happily step aside when they see you waiting with a camera. Sometimes all it takes is a friendly “Do you mind?” and a smile. Other times, there’s no rushing some people. They’ll stand in that exact spot for as long as they want. Dang it! When that happens, go back to tip #3 and be patient, change your angle, try again later, or just move along.
7. Use the Crowd in Your Shot

Sometimes you just aren’t going to get the tourist-free shot of your dreams. The Piazzale degli Uffizi in Florence, right outside the Uffizi Gallery, is almost always packed. You might wish everyone would clear out so you could capture the architecture from front to back, but sometimes wishes don’t come true.
Take the picture anyway. The crowd adds energy and scale, and it shows what the place actually feels like.
Related Post: 30 Things to Do in Florence: Art, Food, & Epic Tuscany Day Trips
8. Take Day Trips to Less Popular Destinations

Big-city icons in Rome, Venice, and Paris are worth seeing so you can say, “I’ve been there!” But getting out of the city and away from the crowds is often where the magic happens. Smaller towns and villages like Orvieto in Italy, Riquewihr in France, and the Cotswolds in England are just as picturesque, with a fraction of the tourists.
Fewer people means more room to compose your shot, more time to wait for the light, and photos that don’t look like everyone else’s.
Related Post: 7 Pretty Villages in the Cotswolds You Need to See!
How to Pose for Vacation Photos & Actually Look Good
Here’s the truth: most people don’t hate how they look. They hate how they look in photos. Learning how to pose for vacation photos takes a little practice and makes a huge difference, whether you’re solo, with your partner, or wrangling the whole family. These tips work just as well for selfies as they do when you hand your camera to a stranger.
9. Wear Colors That Pop

Do you know which colors look best on you? Bright, bold colors brighten your skin tone and make you stand out in your travel photos. It can be as simple as adding a colorful scarf, hat, or jacket.
Think about your destination before you pack. At the beach, skip the blue so you don’t blend into the ocean. In the mountains, red, yellow, or orange pops against green trees and gray rock. In a colorful city, a neutral outfit lets the background shine.
10. Turn 45 Degrees & Find Your Light
Two small adjustments make the biggest difference in how you look in photos: your angle and your light. Facing the camera straight on makes you look wider, so turn your body about 45 degrees instead. Then check where the light is coming from. Soft, even light on your face is far more flattering than harsh overhead sun or deep shadows.
PS. It helps to practice in front of a full-length mirror before your trip.
Picture Posing Tips
- Move to good lighting.
- Turn your body 45 degrees toward the camera.
- Turn your face so one ear is closer to the camera and slightly tilt your chin down.
- Bend your arm to create space between your arm and your body.
- Slightly push your butt out behind you to show a slimmer torso.
- Lean forward from the waist just a touch.
- Stand tall and watch your posture. Sit up straight to elongate and slim your waist.
- Put one foot forward and shift most of your weight to your back foot.
- Be confident.
11. Add Movement for Natural Candid Shots
Stiff, “say cheese” poses are what make most vacation photos look awkward. Movement fixes that fast. Instead of freezing in place, give yourself something to do and let the camera catch you in the middle of it.
Try these:
- Walk toward or away from the camera
- Twirl a skirt or dress
- Look away from the camera at the view
- Adjust your sunglasses or hat
- Tuck your hair behind your ear
- Hold a prop like a water bottle, map, or gelato
Ask whoever is taking the picture to use burst mode so they capture a whole series. One of those frames will look natural and relaxed, and you’ll actually want to share it.
How to Turn On Burst Mode
- iPhone: In the Camera app, slide the shutter button to the left and hold it to fire off a burst. You can also go to Settings > Camera and turn on “Use Volume Up for Burst,” then hold the volume-up button. Check your phone settings if you use a different brand.
- DSLR or mirrorless camera: Switch your drive mode to Continuous or High-Speed Continuous (the icon looks like stacked rectangles). Then hold the shutter button down.
12. Pose as a Couple Without Looking Stiff

Couple photos tend to go wrong in one of two ways: two people standing side by side like a passport photo, or an awkward squeeze that looks forced. The fix is connection. Angle your bodies toward each other, close the gap, and give your hands somewhere natural to go.
Chris is 6’4″ and I’m 5’2″, so getting both of our faces in the same frame is always a challenge. My go-to fix? I find a rock, step, or curb to stand on. A few more tricks that help any couple with a height difference:
- The taller partner widens their stance or bends their knees slightly
- Sit down together on a bench, wall, or ledge to even things out
- The taller partner stands slightly behind and leans in
One catch: tell whoever is taking the picture how you want it framed. We have so many photos where Chris bent his knees to get closer to my height, and the photographer captured every awkward inch of it. If you don’t want the rock, bench, or bent knees in the shot, ask them to frame from the waist up. Otherwise, crop, crop, crop!
More couple poses to try:
- Wrap an arm around your partner’s waist or shoulder
- Lean in with your heads close together
- Look at each other instead of the camera
- Walk hand in hand toward or away from the camera
- Laugh at something real (inside jokes work wonders)
13. Set Up the Shot Before You Hand Off Your Camera
Handing your phone to a stranger is a gamble. Sometimes you get a frame-worthy shot. Other times you get your forehead, a thumb, and none of the landmark you traveled 5,000 miles to see. A few seconds of setup makes all the difference.
Before you hand it over:
- Frame the shot yourself first, then show them exactly what you want in it.
- Point out where to stand, and ask them to hold the camera at chest or eye level.
- Say whether you want it vertical or horizontal (or both).
- Tap the screen to set the focus and exposure on your spot.
- Ask them to take several shots, or turn on burst mode (see tip #11).
Then check the photos before they walk away. A quick “Would you mind taking one more?” is a lot easier than realizing at dinner that every shot is blurry.
Return the favor too. Offering to take someone else’s photo first is the easiest way to find a willing photographer.
14. Use a Tripod or Selfie Stick

If you come home from vacation without a single photo of yourself, it’s time to take matters into your own hands. Selfies are an easy way for solo travelers to capture their adventures and for couples to get in the picture together. (It helps that Chris has long arms!) For wider shots or hands-free photos, a tripod or selfie stick gives you even more control over the framing.

- Tripod: A flexible GorillaPod wraps around railings, branches, and fence posts. It works for a phone or a lightweight camera (up to 6.6 pounds). Set your timer or use burst mode, then step into the frame.
- Selfie stick: A selfie stick with a built-in tripod does double duty. Extend it for wider selfies that show more of the scenery, or prop it up as a mini tripod for hands-free group shots.
Pro tip * Hold your selfie stick slightly above eye level and angle it down.
It’s more flattering than shooting from below.
Tips for Composing Travel Photos
Composition is what separates a quick snapshot from a photo you actually want to frame. These tips for composing travel photos are some of the best travel photography tips for beginners, and none of them require fancy gear. The best part about digital photography? You can take as many shots as you like, delete the ones that don’t work, and keep learning every time you head out with your camera.
15. Consider the Light

Good light can make an ordinary scene look magical, and bad light can ruin a great one. Use natural light from the sun (or the moon) as much as possible. The best light happens during golden hour, the hour after sunrise and the hour before sunset, when everything glows warm and soft.
Midday sun is the trickiest, but sometimes you can’t avoid it while traveling. Here’s what to do when the light is harsh:
- Use a lens hood.
- Find shade for your subject.
- Come back in early morning or evening.
- Have your subject turn their back to the camera.
- Take advantage of the shadows cast by your subject and be creative.
- Shoot from a different angle.
Pro Tip * Do you ever wonder where the ideal position is to have your subject stand in relation to the sun? When you face them, their shadow should fall between the two of you. That means the sun is behind them, which avoids squinting and having harsh shadows on their face.
16. Use the Rule of Thirds

Imagine your screen divided into a grid of nine equal sections, with two vertical lines and two horizontal lines. Instead of centering your subject, place it along one of those lines or where they intersect. It instantly makes your photo feel more balanced and natural.
You can turn on the grid in your camera or your phone’s camera settings so you see the lines as you shoot. After a little practice, you’ll start using the Rule of Thirds without even thinking about it.
That doesn’t mean you should never center your subject. When you want symmetry, like a perfectly reflected mountain or a straight-on shot of a cathedral, centering works beautifully. But for most travel photos, the rule of thirds gives you a more dynamic shot.
17. Watch for Objects Sprouting From Heads

Photography Skills 101: before you snap the shot, check what’s behind your subject. A flagpole, lamppost, sign, tree, or tower lined up perfectly behind someone’s head makes it look like it’s sprouting right out of them. Funny? Sometimes. Frame-worthy? Rarely.
The fix is easy. Have your subject step a little to the left or right, or shift your own angle until the background object clears their head. It’s one of those mistakes you’ll never stop seeing once you notice it.
18. Use Natural Frames

Framing is a composition technique that uses something in the scene to create a border around your subject. It draws the viewer’s eye straight to what matters most and adds depth and dimension to your photo.
Natural frames are everywhere once you start looking:
- Windows and doorways
- Arched entryways
- Tree branches and bushes
- Tunnels and bridges
- Even an umbrella or a gap between buildings
19. Find Leading Lines

Leading lines are features in a scene that guide the viewer’s eye toward your main subject or deeper into the photo. They create movement and a sense of depth, pulling people right into the story you’re telling.
Examples of leading lines:
- Roads and pathways
- Railroad tracks
- Fences and railings
- Staircases
- Bridges
- Rivers and shorelines
- The aisle in a church
- Architectural features
- Waves rolling onto the beach
Related Post: Vibrant Fall Foliage in North Carolina
20. Shoot From a Creative Angle

Sometimes taking a better travel photo just means changing your point of view. Instead of shooting everything at eye level, try getting low and shooting up, or finding a higher vantage point and looking down.
A few ways to switch it up:
- Crouch down to a child’s level
- Stand on your tiptoes, or hold your phone above the crowd
- Shoot straight down from a bridge, balcony, or overlook
- Lie on the ground to make a building or tree look towering
If your kids are at a playground, try standing under the climbing structure and shooting up, or above it looking down. You’ll be surprised how different the same scene looks from a new angle.
21. Capture a Reflection

Some of the coolest travel photos come from capturing a reflection instead of the subject itself. Reflections add symmetry, depth, and a little bit of magic to an ordinary scene.
Where to look for reflections:
- Puddles after a rain shower
- Calm lakes, rivers, and ponds
- Wet sand at low tide
- Shop windows and glass buildings
- Mirrored sunglasses
Here’s a fun trick: some photographers travel with a water bottle just for this. They pour a little water on the ground in front of a landmark to create their own puddle, then get low and shoot the reflection.
22. Focus on the Eyes
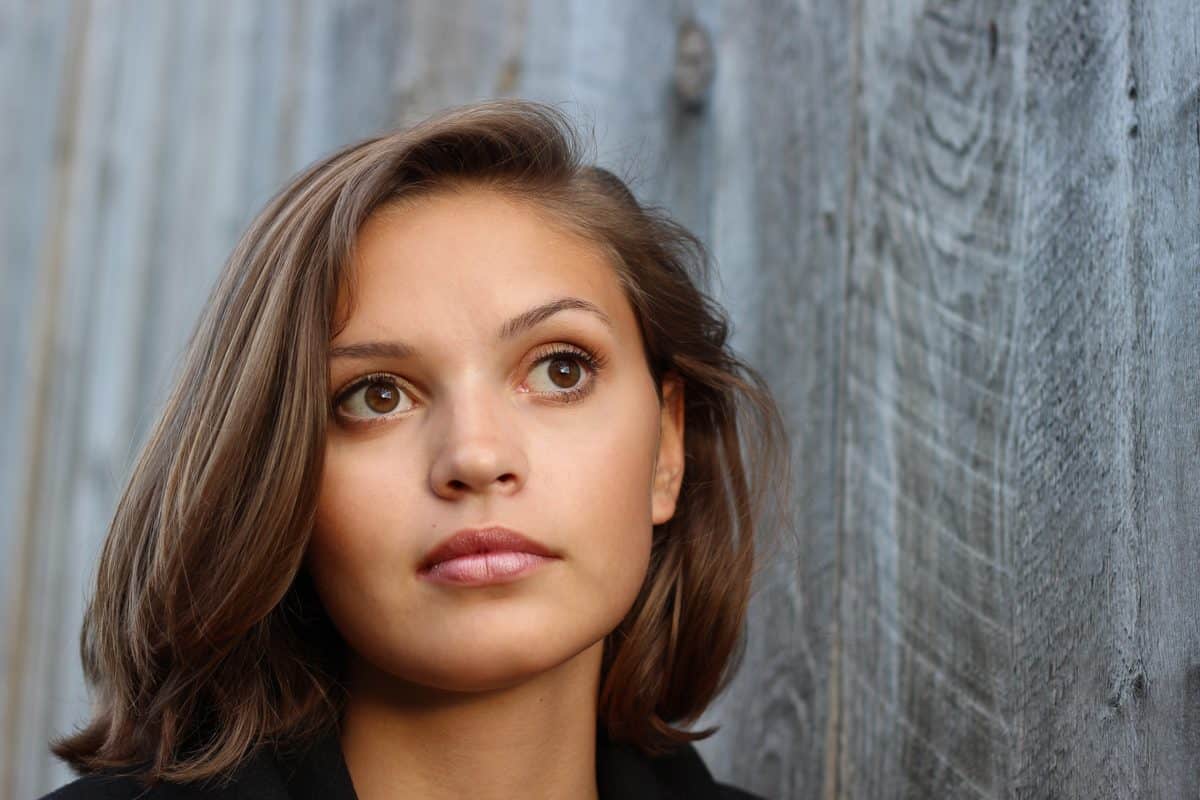
When you’re photographing people, the eyes are where viewers look first, so that’s where your focus should be. If you’re shooting at an angle, focus on the eye closest to the camera. Remember the rule of thirds? Placing that eye on one of the intersecting points makes your portrait even stronger.
There’s nothing more frustrating than getting home and finding out a great shot is out of focus, or focused on the wrong thing entirely. On your phone, tap the screen right on your subject’s eyes before you take the picture. On a camera, use a single focus point and place it on the eye.
23. Look for Contrasting Colors

Contrasting colors make a photo pop and grab attention fast. Look for color pairs that sit opposite each other on the color wheel, like orange and blue, red and green, or yellow and purple.
A few easy ways to find contrast while traveling:
- In the mountains, zoom out a little to include some bright blue sky.
- In the fall, frame red and orange leaves against a blue sky.
- At the beach, look for colorful umbrellas, boats, or buildings against the water.
- In a city, watch for bright doors, flower boxes, or street art against neutral walls.
Even a small pop of contrasting color can turn an ordinary scene into a standout shot.
24. Straighten Your Horizon & Edit Later

My biggest photography pet peeve? A crooked horizon. It’s especially noticeable in ocean and lake photos, where a tilted waterline makes the whole scene look like it’s sliding off the page. Before you post anything online, straighten that horizon.
The good news is that editing fixes a lot. Free apps on your phone, or desktop programs like Adobe Lightroom and Photoshop, let you:
- Straighten and crop your photos
- Brighten shadows and tone down harsh highlights
- Remove people or distractions from the background
- Boost color without overdoing it
If you’ve never used Adobe products, expect a bit of a learning curve. Start with the basics (straighten, crop, and brighten) and build from there.
Adventure Photography Tips for Beginners
Adventure photography is where things get tricky. Your subject is moving, the light keeps changing, and you’re usually holding on to something with your other hand. These travel photography tips for beginners will help you get comfortable with your camera so you can capture the action, whether that’s paragliding off a Swiss mountain or rafting a Colorado river.
25. Protect Your Gear on the Trail
Adventure travel is hard on camera gear. Dust, rain, river spray, snow, and the occasional slip can ruin a camera (or a whole trip’s worth of photos) fast. A little protection lets you focus on the moment instead of worrying about your equipment.
- Use a wrist strap or lanyard so your camera or phone can’t go flying.
- Pack a dry bag for rafting, boating, or beach days.
- Bring a rain cover or even a plastic bag for sudden storms.
- Carry spare batteries, since cold weather drains them quickly.
- Keep a lens cloth handy for spray, fog, and fingerprints.
- Back up your photos every night.
For the wettest, wildest adventures, a waterproof action camera like a GoPro is built to keep up. It clips onto a helmet, chest mount, or backpack strap, perfect for any activity Chris talks me into!
26. Freeze the Action With a Fast Shutter Speed
Paragliding, rafting, snowmobiling, and other adventures happen fast, and slow shutter speeds turn them into a blurry mess. To freeze the action, you need a fast shutter speed.
General guidelines:
- 1/500 second for people walking, hiking, or moving at a steady pace
- 1/1000 second or faster for fast action like paragliding, rafting, or splashing water
- Bright daylight makes fast shutter speeds much easier, so plan your action shots for good light when you can
On a camera, switch to Shutter Priority mode (Tv on Canon, S on Nikon and Sony). You set the speed, and your camera handles the rest. Pair it with continuous autofocus (AI Servo on Canon) so your camera keeps tracking a moving subject, and use burst mode (see tip 11) to catch the perfect moment.
On a phone, burst mode is your best friend for action. Some newer phones also offer an Action mode for video that smooths out bumpy footage.
27. Keep Your Phone Handy for Fast-Moving Adventures
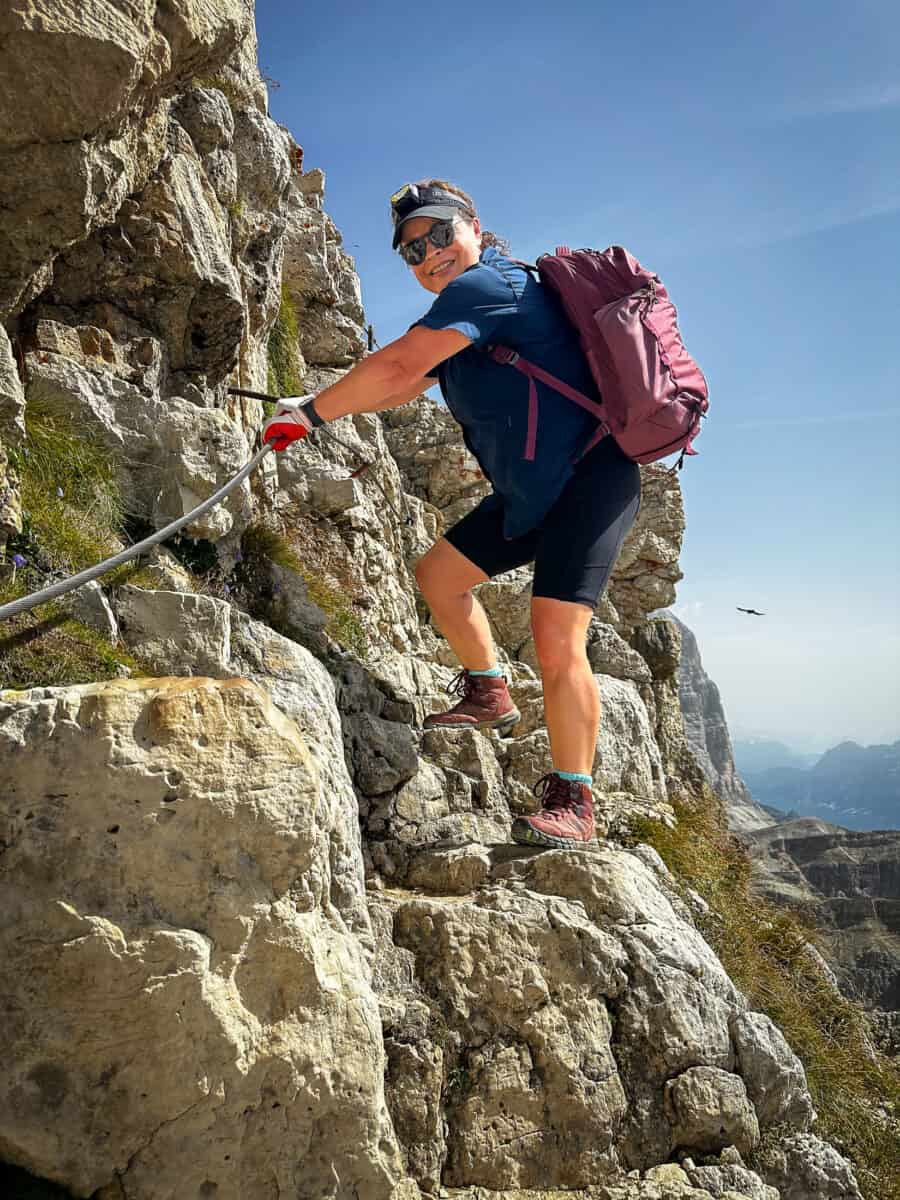
On the trail, on the water, or mid-adventure, keep your phone handy with the camera app ready to go, even if you shoot with a DSLR or mirrorless camera. Keep your phone handy with the camera app ready to go. Switching between the two takes a little fancy handwork, but it pays off. When the lighting is tricky, you need to shoot from a higher angle, or you just can’t swap lenses fast enough, your phone can save the shot.
Don’t be afraid to use your phone for travel and adventure photography. Today’s phone cameras have seriously impressive technology, and they’re often easier to use on the go. On active days, a phone lanyard or crossbody strap keeps it close without risking a drop.
Chris and I spent two weeks in the Dolomites, and we shot the entire trip on our iPhones, from sunrise in Santa Lucia to the hike around Tre Cime di Lavaredo to climbing through the Lagazuoi tunnels. Leaving the big camera at home meant a lighter pack on long hiking days, and I didn’t miss a single shot.
Related Post: Dolomites Itinerary: Planning an Italian Alps Trip
28. Scout Photo Spots & Study Other Photographers in Advance

One of the best ways to improve your photography is to study other photographers. Follow your favorites on Instagram and Pinterest, and pay attention to how and where they shoot. If you’re planning a Trip to France, see what others have captured there before you go.
As you look at their photos, ask yourself:
- What time of day did they take the picture?
- Did they shoot from above or below?
- Did they include people in the shot?
- What creative angle did they use?
Then do a little scouting. Search “Instagrammable places in [your destination]” to find the most photogenic spots, and save the ones you love. You can also study photos that professionals have taken to see how they use angles, focus, and light.
29. Learn Camera Basics—Take a Course

If you want to move beyond Auto mode, start by understanding how ISO, aperture, and shutter speed work together. It takes a little effort to wrap your head around, but once it clicks, you’ll have far more control over every shot.
Many professional photographers encourage you to shoot in Manual mode. When you’re traveling and moving quickly from one scene to the next, though, Aperture Priority mode is a great middle ground. You choose the aperture, and your camera figures out the shutter speed, so you can compose quickly and still get sharp, well-exposed shots.
Then practice. Practice on your family, your friends, and the flowers in your garden. Every trip you take is another chance to get better.
If you want a structured way to learn, Audrey Ann from Live Snap Love has some fantastic beginner-friendly courses:
Want to learn more about these courses? Discover the 5 Best Travel Photography Courses for Beginners.
30. Book a Photography Tour
Want to level up fast? Book a photography tour. Many cities around the world offer photo walks led by local photographers who know the best spots, the best light, and the best times to beat the crowds. You’ll pick up new techniques, see a destination through a photographer’s eyes, and come home with shots you might never have found on your own.
Some tours even include a mini photoshoot, so you finally get great photos of yourself (no selfie stick required). If you’re traveling with family, a vacation photoshoot is a fun way to get everyone in the picture.
Related Post: Family Photography: 10 Super Reasons to Plan a Family Photoshoot on Vacation
Search your destination on Viator to discover more ideas:
Captions for Your Travel Photos
Once you’ve captured the perfect shot, you need the perfect caption to go with it. I post mostly photos with captions on Instagram, and a great caption can make a good photo feel even more personal. Here are a few of my favorite caption posts for travel and adventure photography:
- 300+ Instagram Content and Travel Caption Ideas for Bloggers
- 75 Romantic Instagram Quotes for Couples Who Love to Travel
- 100 Instagram Travel Captions
- 65 Awesome Travel Quotes for Instagram
Photography & Travel Captions
- You can always take a great photo—no matter what the conditions. – Steve Davey
- The whole point of taking pictures is so you don’t have to explain things in words. – Elliott Erwitt
- Travel photography is really a way of life: a way of traveling.”– Steve Davey
- Having a camera around your neck gives you a good excuse to be nosy. – Martin Parr
- Take only pictures, leave only footprints.
- Never stop looking, no matter where you are, everywhere there are good photographs. – Art Wolfe
- If you want to be a better photographer, stand in front of more interesting stuff. – Jim Richardson
- The real voyage of discovery consists not in seeking new landscapes, but in having new eyes. – Marcel Proust
Best Cameras for Travel
The best camera for travel is the one you’ll actually carry. Here are my picks by type, from pocket-size point-and-shoots to full-frame mirrorless cameras.
Best Cameras for Travel
Point & Shoot Cameras — The pocketable PowerShot SX740 HS is a do-it-all compact with 4K video and impressive zoom range. No lens swapping required. For a step up in performance, the Canon PowerShot V1 delivers better image quality and video in a still-compact body.
DSLRs — One of the lightest DSLRs on the market, the Canon Rebel SL3 has a great battery life, a vari-angle touchscreen, and solid image quality in a comfortable grip. Ready to go full-frame? The Canon EOS 6D Mark II (my current camera) delivers professional-level image quality with a fully articulating screen and impressive low-light performance—a favorite among travel photographers who don’t want to make the jump to mirrorless just yet.
Mirrorless Cameras — The Canon EOS R50 is the sweet spot for travel: 24.2MP, 4K video, lightweight, and beginner-friendly without sacrificing quality. Step up to the Canon EOS R8 if you want full-frame performance in a carry-all-day body, or the Canon EOS R7 for serious action and wildlife shooting at 32MP.
Adventure & Underwater Cameras — Built for the moments when your camera needs to keep up with you. The GoPro Hero 13 is waterproof, shockproof, and small enough to clip anywhere—perfect for hiking, rafting, snorkeling, or any activity Chris talks me into!
Phone Camera — Arguably the best camera is the one you always have with you. Today’s smartphone cameras are genuinely impressive, and for social media and quick shots, they’re hard to beat whether you’re shooting with an Apple iPhone, Samsung Galaxy, or Google Pixel.
Check out my Photography Gear on Amazon for more ideas and recommendations.

Frequently Asked Questions
What makes a great travel photo?
Anyone can snap a picture of the Eiffel Tower. A great travel photo combines good light, strong composition, and a sense of place or story. As Ansel Adams said, “Sometimes I arrive just when God’s ready to have someone click the shutter.”
How can I take better travel photos?
Start with timing and light. Visit popular spots early or late to avoid crowds and catch softer light. Then use simple composition rules like the rule of thirds, leading lines, and natural frames. Finally, practice with every trip and straighten your horizon before you share.
Is a smartphone good for travel and adventure photography?
Yes. Today’s smartphones take impressive travel photos and are easier to carry everywhere. A dedicated camera still has the edge for zoom, low light, and fast action, but for most travelers and social media, a phone does the job beautifully.
What are the best travel photography tips for beginners?
Learn your camera’s basics, turn on the grid, and use the rule of thirds. Shoot during golden hour, watch for distracting backgrounds, and focus on your subject’s eyes. Take lots of photos, then edit your favorites with a quick crop, straighten, and brighten.
How do I pose for vacation photos?
Turn your body about 45 degrees toward the camera, find soft light on your face, and keep your posture tall. Add movement by walking, twirling, or looking at the view.
How do you take travel photos without tourists in them?
Arrive early or late, be patient, and have your settings ready for a quick break in the crowd. You can also block people with your subject, frame the shot above their heads, ask them politely to move, or crop them out later.
Love this Post? Pin it!

Ready, Set, Snap: Your Photo Library Is About to Get a Glow Up
Taking better travel photos isn’t about owning the fanciest camera. It’s about timing, light, a few composition tricks, and the confidence to step in front of the lens once in a while. The real secret? Practice, practice, practice. Every trip is another chance to get the shot and actually look good in it too.
Before your next adventure, grab my free Travel Photography Shot List so you never miss a must-have photo. And when you get home, find creative ways to display your travel photos so they don’t just live on your phone.
You may also love…
- 15 Most Beautiful Places in Italy for Photographers
- 15 Popular Photography Gadgets
- 25 Adventurous Activities for an Epic Bucket List
- 50 Clues for a Fun Photo Scavenger Hunt: Road Trips, Travels & Adventures
- 23 Instagram Worthy Beautiful Lakes Around the World
- 15 Most Beautiful Places in the Cotswolds (Bring Your Camera…You’ll Need It!)
- 25 Incredible Instagrammable Spots in the Algarve, Portugal
Great tips! I definitely try to avoid popular spots at popular times, because I am definitely not an expert at editing people out of my photos. I also really would like to start taking photos with a camera and not just a smart phone, I think that’s a great way to step up my photography game!
This is a super helpful guide! I try to use a lot of these techniques when I take photos too, but you also taught me something new with the use of the grid on your phone camera – great idea! I also swear by my selfie stick/tripod; it really comes in handy for those couple shots. Xx Sara
This is such a useful guide! I definitely need to work on my patience more as I’m not an expert at removing people from shots with software. Even using a grid, I always end up with focal points in the centre, but I guess that takes practice to break that habit. Also, love the tip on the lighting shadow direction!
Great tips Jolayne! I agree with all of these – and above all, be patient haha! Avoiding group tours is another big one for me, where possible! I’m a huge fan of Adobe Lightroom for editing. Thanks for sharing!
Patience is a virtue, especially when traveling.
Interesting idea to use the grid to take photos! Patience is definitely key when you’re trying to get photos in busy spots. We always get at least one person walking into the photo who doesn’t seem to notice we’re taking photos.
This is a fantastic post! I think so many of us are looking to up our photography game and guides like this definitely help 🙂
Thanks so much. I know I can always use helpful tips.
These are some great tips! I’m always looking to take better travel photos so I’ll be sure to test out your suggestions! And it is a good reminder that I need to spend some time getting to know my new camera too! So far it is stuck on manual mode! Thanks for the great guide!
Love all these tips! I use the Grid on iPhone camera all the time – it really helps!
It is pretty handy even if it is just a reminder.
I wished I could just ask people to move aside sometimes, but I’m so socially awkward I almost always NEVER say anything hahahah.. I like the tip about just working them into your composition though! Definitely a creative alternative way to just make the situation work for you and I’m gonna keep that positive attitude with me the next time I’m out there!
These are some great tips! I always try to get to touristy spots during off-times exactly for this purpose. I’m not a professional photographer but I can at least try to not have a bunch of people in my pictures haha
So many great photo travel tips! I especially like the ones for take better photos of yourself!
So sorry for your loss. Keep practicing on the photography and editing and you will find improvement.
A really comprehensive post, very useful. I’ve definitely suffered from photo frustration, where my mind- and even my eye- can see the capture I want but I can’t master my camera/ timing/ settings to quite get it. Practice for progress, I suppose!
On a different note, I’m glad to see the humble selfie stick getting a mention. I think they got a bad reputation at one point but used with consideration- a great tool.
WOW! This is a very comprehensive list with tons of great advice. Would be useful for everyone regardless of their skill level.
These are some great tips! I especially like the ideas for posing and wearing colors that pop.
We all want to look fantastic in our pics right?
Great tips! I am a big fan of avoiding crowds and shooting early in the morning when possible. I also love the idea of wearing items that pop – it’s great to think about contrast when shooting.
Haha i love the bit about be patient, but also simply ask people to move. So true!
Patience is a virtue as a photographer.
This guide was SO helpful! Thank you! I really appreciated the tip about shadows.
Thanks. I always love to learn more about photography.
Wait, you mean people DON’T like to see things coming out of their heads in photos?! Just kidding, but truly, that was a tip that I used to never think about, LOL! Great ideas, and beautiful photos.
Wow! Some great tips here. Thank you for sharing.
Thanks so much.
I love your photos! I have to start using my selfie stick!
Thanks. I am photography junkie. Just can’t help myself.
Love this post! I love taking photos and slowly but surely getting better at doing so over the years has been so rewarding. Great read <3
I like the rule of thirds– I have started using this recently and the composition is so much better!
It is where you eye tends to focus
Thanks for these helpful tips, Jolayne! Will have to try putting some of them into practice ?
Lots of great advice. I love taking photos when I’m traveling, I just need to practice with not making them on auto. We had the general Sherman tree without others since we visited at the end of April. There was another couple and we took pictures of them and they of us.
Very useful guide as I have a trip coming up! I was especially interested in the lens you recommended. Thanks!
Very helpful tips. Thanks for sharing your favorite camera equipment. That’s very helpful!
Great tips. We are constantly taking blurry pictures while running. Advice for being patient is definitely key.
Great Post! I bought myself a camera as a Christmas present a few years ago and I’m scared to death of it. So many settings to navigate through. I definitely need to take a class to get some of the basics down. Lots of great information here. Thank you!
Really some great and some easy-to-implement tips in this post! Thank you for putting this together.
Great post. Mastering photography is on my to-do list.
So many great tips here! And I definitely need to start practicing how to take better photos of myself, LOL!
Great and detailed post. This will definitely help our followers!
Great post! Definitely will give this a closer read later. I consider myself a decent amateur photographer, so really appreciate all the info and great tips!
You have some lovely photos on this post. I find these tips very useful and will try to remember them the next I am out and about. Thanks for sharing!
What a great post! I’m the photographer of the family so I’ll send this to my family and friends that I travel with as a *hint hint* for when they’re taking photos of me on trips! I usually whip out the tripod, but some places are just too crowded for that.
Great post! Tons of good photography tips here. Thanks for sharing!
Oh wow thanks for taking the time out to write these great tips! I just got the gorilla tripod 3k (i’m still not sure of the difference between the other models), but I can’t wait to use it. I always wait patiently for people to move out of the way too, but i’m telling the move in a nice way might not be to bad either lol.